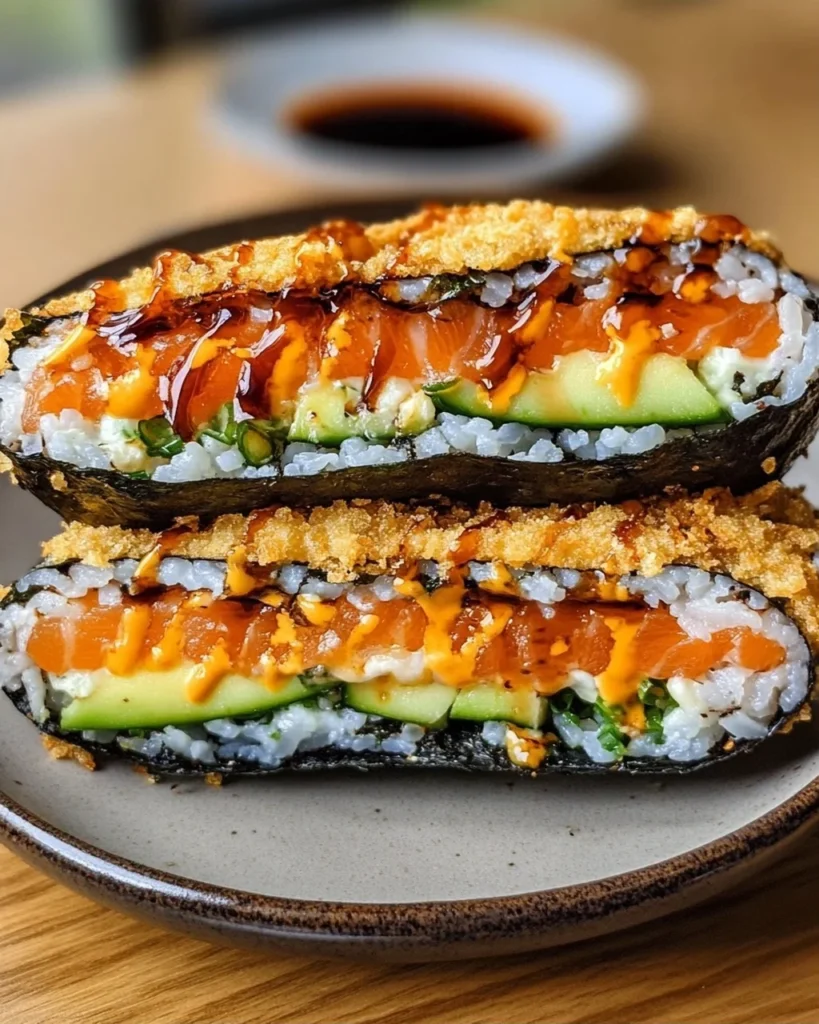
If you’re looking for a fun and delicious twist on traditional sushi, then this Crispy Sushi Burger is just what you need! It combines the best of both worlds—sushi and burgers—into one delightful dish that’s sure to impress. This recipe has become a favorite in our home, not just because it’s packed with fresh flavors but also because it’s perfect for various occasions. Whether you’re throwing a dinner party or just enjoying a cozy night in, these sushi burgers are a hit!
The crispy exterior gives way to layers of creamy avocado, fresh salmon, and flavorful sushi rice, making each bite a little piece of heaven. It’s the kind of meal that feels indulgent yet is surprisingly easy to prepare. Let’s dive into why you’ll love this recipe!
Why You’ll Love This Recipe
- Easy to Make: This recipe may look fancy, but it’s straightforward enough for even novice cooks to tackle.
- Family-Friendly: Kids and adults alike enjoy the fusion of flavors and textures.
- Make-Ahead Option: Prepare the sushi burgers in advance and fry them up when you’re ready to eat!
- Customizable: Feel free to mix and match ingredients based on your preferences.
- Impressive Presentation: Serve these at your next gathering, and watch your guests be amazed!
Ingredients You’ll Need
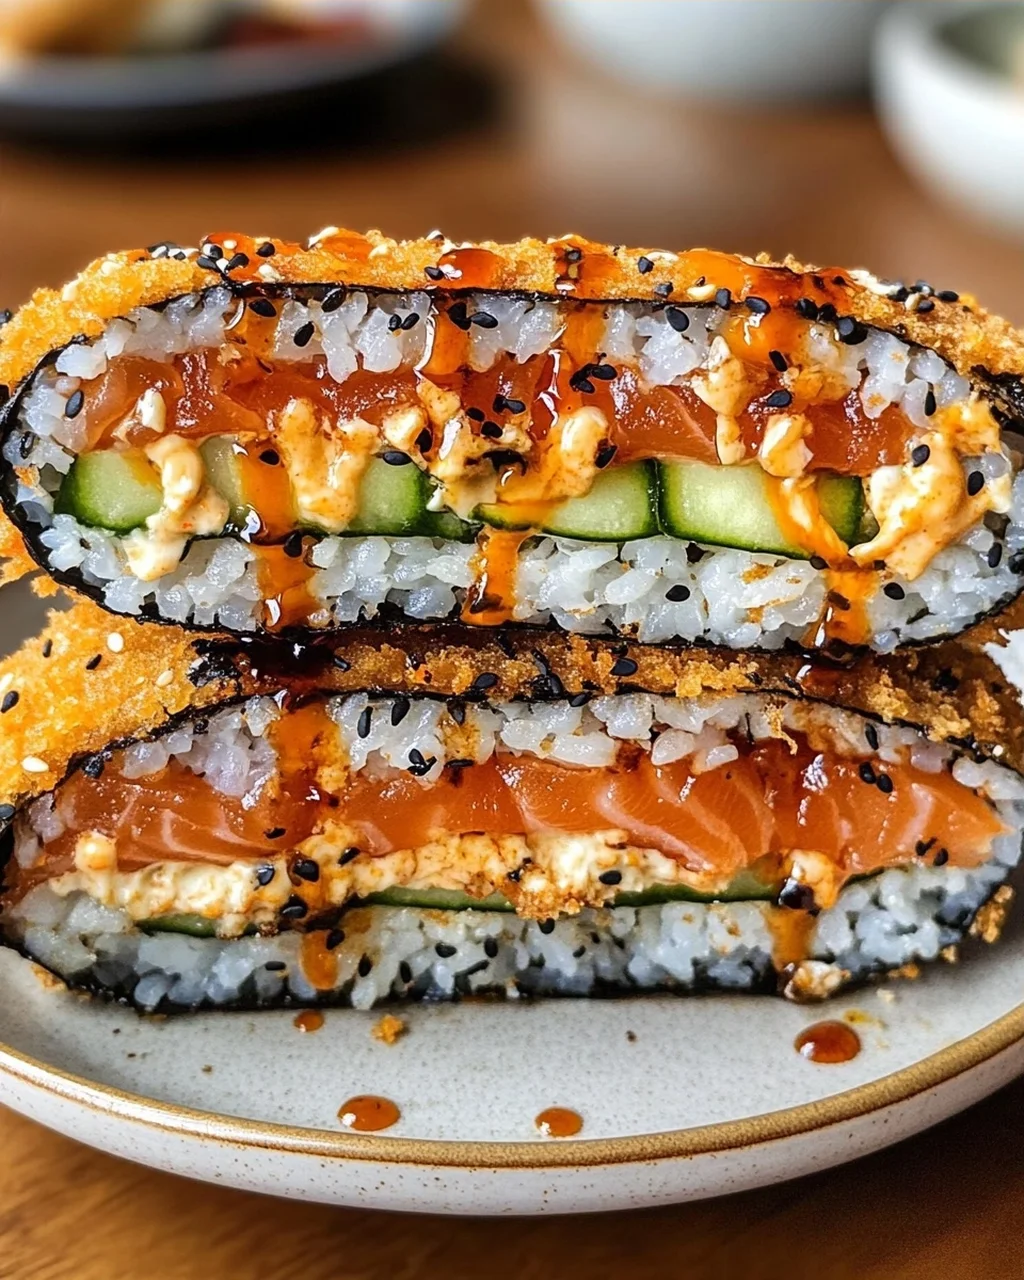
For this Crispy Sushi Burger, you’ll be using simple, wholesome ingredients that come together beautifully. From the golden-fried nori shell to the creamy filling of avocado and cream cheese, every component adds its own special touch. Here’s what you’ll need:
- 2 nori sheets, divided as needed for wrapping
- 2 cups cooked sushi rice, cooled to room temperature
- 3 tablespoons sushi vinegar, for seasoning the rice
- 0.5 cup all-purpose flour, for the binding slurry
- 2 tablespoons cornstarch, helps thicken the slurry
- 0.5 cup water, approximately, for the slurry
- 1 cup Japanese panko breadcrumbs, for the crispy coating
- 3-4 cups oil for frying, vegetable or canola
- 4 ounces cream cheese, softened slightly
- 1 cucumber, thinly sliced
- 1 ripe avocado, sliced
- 6 ounces sashimi-grade salmon, thinly sliced
- Sriracha mayo, for drizzling
- Eel sauce, for drizzling
- Furikake, Japanese seasoning blend for garnish
Variations
This recipe is wonderfully flexible! You can easily tweak it to suit your taste or dietary preferences. Here are some fun ideas:
- Swap the protein: If salmon isn’t your thing, try using cooked shrimp or even tofu!
- Add some crunch: Toss in shredded carrots or radishes for an extra layer of texture.
- Change up the sauce: Experiment with different sauces like spicy mayo or teriyaki drizzle.
- Go vegetarian: Replace fish with more veggies like bell peppers or mushrooms.
How to Make Crispy Sushi Burger
Step 1: Season the Rice
If using freshly cooked sushi rice, fold in the sushi vinegar gently while it’s still warm. This helps enhance the flavor of the rice. Once mixed, spread it on a baking sheet and let it cool to room temperature—this takes about 15 to 20 minutes.
Step 2: Make the Slurry
In a bowl, whisk together the all-purpose flour and cornstarch. Gradually add water while whisking until you achieve a smooth paste-like consistency that coats the back of a spoon. This will help bind everything together when frying.
Step 3: Prep the Breading Station
Pour your panko breadcrumbs into a separate shallow bowl; this will be used to coat your sushi burger later on. Having everything laid out makes assembly easier.
Step 4: Start with the Base
Lay one nori sheet on a clean surface with the shiny side facing down. This ensures that when you fry it later, it becomes nice and crispy.
Step 5: Add the Rice Layer
Spread a thin round layer of cooled sushi rice in the center of your nori sheet—about 1/4 inch thick and roughly 4 to 5 inches in diameter. This base layer holds everything together.
Step 6: Layer the Fillings
Now it’s time for flavor! Spread softened cream cheese over the rice layer first. Then arrange cucumber slices, avocado slices, and sashimi-grade salmon right in the center.
Step 7: Seal with Rice
Top those delicious fillings with another thin layer of sushi rice. Brush around the edges of your nori with flour slurry; this helps seal everything up tightly.
Step 8: Wrap Tightly
Fold and wrap your nori around all those tasty layers, sealing with additional slurry if needed. If one sheet isn’t enough to completely enclose your burger, don’t worry—just use another nori sheet!
Step 9: Shape and Wrap
Gently shape your wrapped burger into a round flat disc about three inches in diameter. Once shaped, wrap it tightly with cling wrap to help it hold its form.
Step 10: Chill
Refrigerate your wrapped burger for about 15 to 20 minutes so that everything firms up nicely—it makes frying much easier!
Step 11: Prepare for Coating
Carefully remove cling wrap from your chilled burger, then dip it entirely into that lovely flour slurry you made earlier.
Step 12: Coat with Panko
Now roll your slurry-coated burger in panko breadcrumbs! Press gently so they stick well before placing it on a plate.
Step 13: Heat the Oil
In a deep skillet or pot, heat oil until it reaches about 350°F (175°C). Using a thermometer ensures that you get that perfect crispy finish when frying.
Step 14: Fry the Burger
Gently place your sushi burger into hot oil and fry for about three to four minutes—turning once halfway through—until it’s golden brown and crispy all around.
Step 15: Drain
Once fried, transfer your delicious creation onto a paper towel-lined plate so any excess oil can drain away—a crucial step for keeping them crispy!
Step 16: Slice Carefully
Using a sharp knife, slice through your sushi burger right down the middle to reveal those beautiful layers inside—your friends are going to love this part!
Step 17: Dress It Up
Drizzle some sriracha mayo and eel sauce over each cut side as well as around your plate; it brings everything together beautifully!
Step 18: Garnish and Serve
Finally, sprinkle furikake on top before serving immediately while they’re still warm and crunchy outside but cool within! Enjoy every delicious bite!
Pro Tips for Making Crispy Sushi Burger
Making a crispy sushi burger can be a delightful adventure in the kitchen, and with a few helpful tips, you’ll be well on your way to a perfect dish every time!
Use Fresh Ingredients: The quality of your salmon and vegetables will significantly impact the flavor. Fresh, high-quality ingredients not only taste better but also enhance the overall presentation of your sushi burger.
Don’t Skip the Chilling Step: Allowing your assembled sushi burgers to chill before frying helps them hold their shape. This step ensures the filling is compact and reduces the risk of them falling apart during cooking.
Control Your Oil Temperature: Maintaining the oil at 350°F (175°C) is crucial for achieving that golden-brown crispiness. If the oil is not hot enough, the burgers may absorb excess oil, making them greasy instead of crispy.
Press Panko Firmly: When coating your sushi burger with panko breadcrumbs, press them down gently to ensure they adhere well. This creates a thicker, crunchier crust that adds to the overall texture.
Experiment with Fillings: Feel free to get creative with your fillings! Adding ingredients like pickled vegetables or spicy tuna can give your sushi burger a unique twist that suits your personal taste.
How to Serve Crispy Sushi Burger
Presentation can elevate your crispy sushi burger from delicious to utterly spectacular! Here are some fun ways to serve this dish that will impress your family and friends.
Garnishes
- Sesame Seeds: A sprinkle of toasted sesame seeds adds a lovely crunch and nutty flavor, enhancing both appearance and taste.
- Microgreens: These delicate greens provide freshness and color contrast, making your plate pop visually while adding an earthy flavor.
- Pickled Ginger: Serve alongside pickled ginger for a refreshing palate cleanser between bites of rich flavors.
Side Dishes
- Edamame: Lightly salted edamame makes for a healthy and fun finger food that complements the flavors of the sushi burger wonderfully.
- Seaweed Salad: This tangy salad offers a nice contrast in textures and flavors, balancing the richness of the fried burger.
- Miso Soup: A warm bowl of miso soup is comforting and pairs beautifully with sushi dishes, providing umami goodness without overwhelming other flavors.
- Cucumber Salad: A light cucumber salad dressed in rice vinegar adds brightness and crunch, creating a refreshing side that enhances the meal’s overall experience.
Now that you have all these tips and serving suggestions at hand, get ready to impress everyone with your homemade crispy sushi burgers! Enjoy every bite!
Make Ahead and Storage
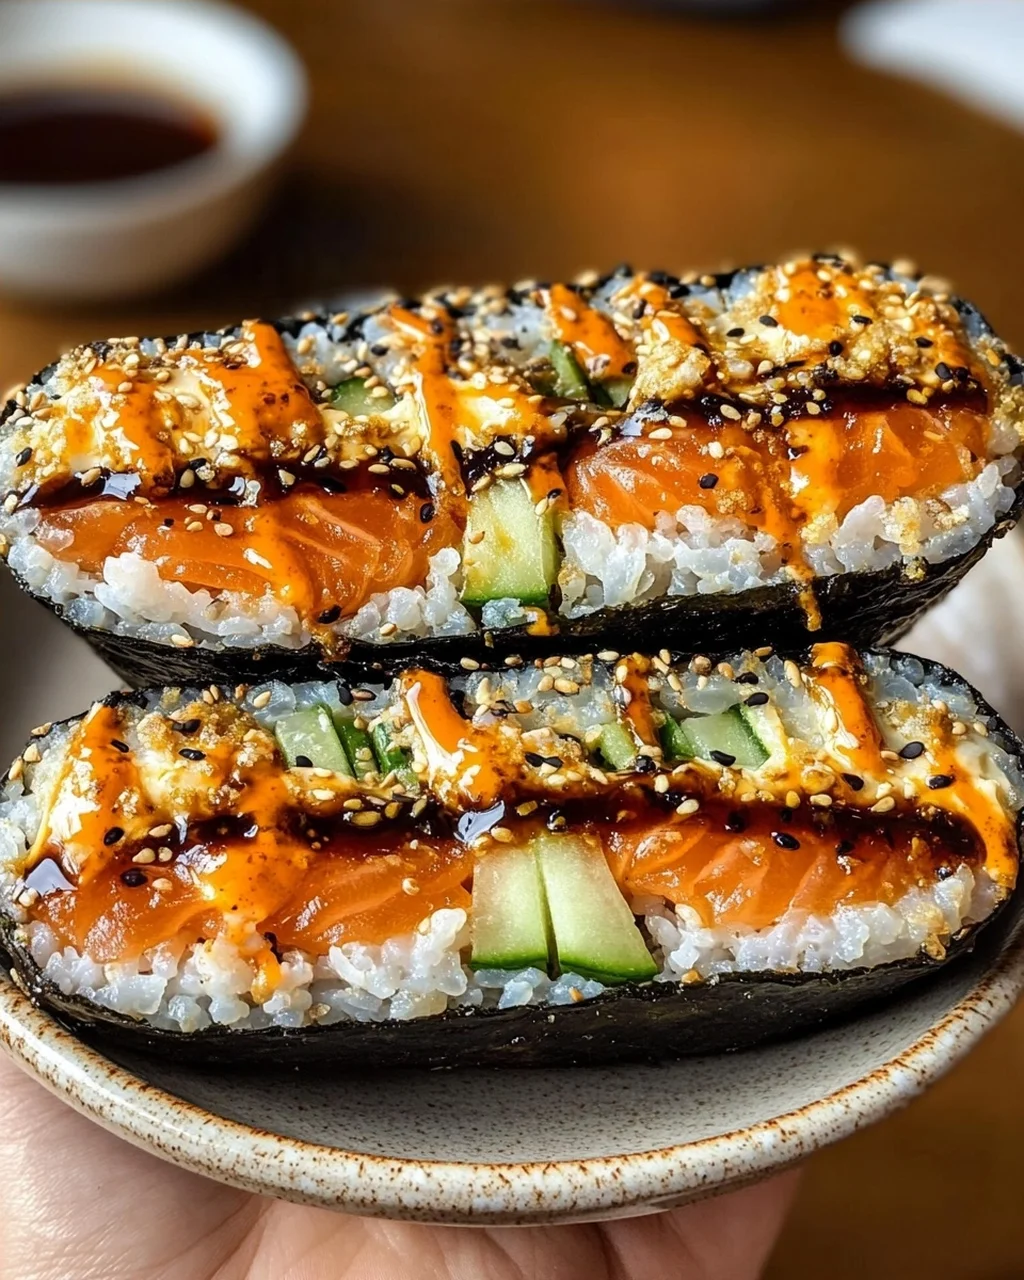
This Crispy Sushi Burger is perfect for meal prep! Not only can you make it ahead of time, but it also stores well, allowing you to enjoy a delightful meal whenever you want. Here’s how to keep your sushi burgers fresh and tasty.
Storing Leftovers
- Store any leftover sushi burgers in an airtight container in the fridge.
- Consume within 1-2 days for the best flavor and texture.
- Avoid stacking burgers to prevent them from becoming soggy.
Freezing
- Wrap individual sushi burgers tightly in plastic wrap before placing them in a freezer-safe container or bag.
- Freeze for up to 1 month for optimal freshness.
- Label with the date to keep track of storage time.
Reheating
- For best results, let frozen sushi burgers thaw overnight in the fridge before reheating.
- To reheat, use an air fryer set at 350°F (175°C) for about 5-7 minutes until heated through and crispy again.
- Alternatively, you can reheat in a skillet over medium heat, turning occasionally until warmed.
FAQs
Here are some common questions about making the Crispy Sushi Burger!
Can I use other fish instead of salmon for the Crispy Sushi Burger?
Absolutely! You can substitute salmon with your choice of sashimi-grade fish like tuna or even shrimp. Just ensure it’s fresh and prepared safely.
How do I make a vegetarian version of the Crispy Sushi Burger?
For a vegetarian option, replace the salmon with additional avocado, cucumber, or even grilled vegetables. You could also add tofu for extra protein!
What should I serve with my Crispy Sushi Burger?
This dish pairs wonderfully with a side salad or some edamame. A light dipping sauce on the side can enhance the flavors even more!
Can I prepare the rice ahead of time for my Crispy Sushi Burger?
Yes, you can cook and season your sushi rice ahead of time. Just be sure to cool it completely before storing it in the refrigerator.
Final Thoughts
I hope you’re as excited to make this Crispy Sushi Burger as I was when I first tried it! This innovative recipe brings together delightful flavors and textures that are sure to impress. Whether you’re serving it at a gathering or enjoying it on a cozy night in, it’s a fun way to indulge in sushi without needing a special occasion. Enjoy every bite and don’t hesitate to share your creations—I’d love to hear how yours turn out!
Crispy Sushi Burger
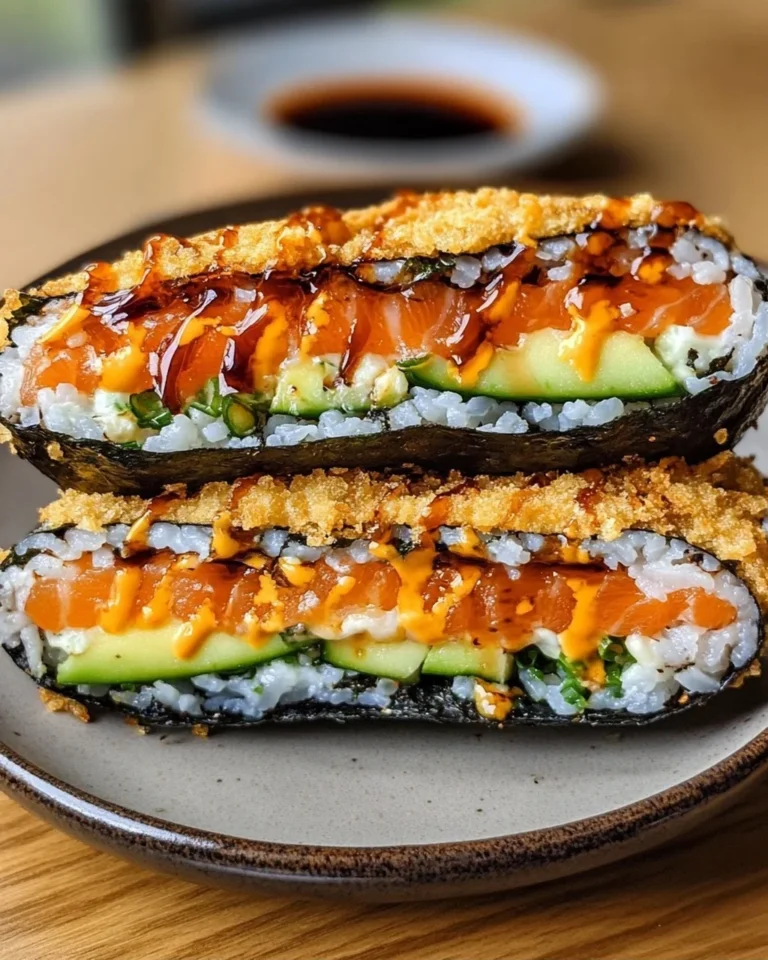
A golden-fried nori shell encases layers of cool sushi rice, creamy avocado, fresh salmon, cucumber, and cream cheese in this innovative fusion dish.
- Total Time: 45 minutes
- Yield: 2 servings 1x
Ingredients
- 2 sheets nori (divided as needed for wrapping)
- 2 cups cooked sushi rice (cooled to room temperature)
- 3 tablespoons sushi vinegar (for seasoning the rice)
- 0.5 cup all-purpose flour (for the binding slurry)
- 2 tablespoons cornstarch (helps thicken the slurry)
- 0.5 cup water (approximately, for the slurry)
- 1 cup Japanese panko breadcrumbs (for the crispy coating)
- 3–4 cups oil (for frying, vegetable or canola)
- 4 ounces cream cheese (softened slightly)
- 1 cucumber (thinly sliced)
- 1 ripe avocado (sliced)
- 6 ounces sashimi-grade salmon (thinly sliced)
- Sriracha mayo (for drizzling)
- Eel sauce (for drizzling)
- Furikake (Japanese seasoning blend for garnish)
Instructions
- Season the Rice: If using freshly cooked sushi rice, fold in the sushi vinegar gently while the rice is still warm, then spread it on a baking sheet and let it cool to room temperature, about 15 to 20 minutes.
- Make the Slurry: In a bowl, whisk together the flour and cornstarch, then gradually add water while whisking until you reach a smooth, paste-like consistency that coats the back of a spoon.
- Prep the Breading Station: Pour the panko breadcrumbs into a separate shallow bowl, ready for coating.
- Start with the Base: Lay a whole nori sheet on a clean, dry surface with the shiny side facing down.
- Add the Rice Layer: Spread a thin, round layer of cooled sushi rice in the center of the nori, about 1/4 inch thick and roughly 4 to 5 inches in diameter.
- Layer the Fillings: Spread a thin layer of softened cream cheese over the rice, then arrange cucumber slices, avocado slices, and sashimi-grade salmon in the center.
- Seal with Rice: Top the fillings with another thin layer of sushi rice, then brush the edges of the nori with the flour slurry.
- Wrap Tightly: Fold and wrap the nori around the filling, sealing with more slurry if needed; use a second nori sheet if the first doesn't completely enclose the burger.
- Shape and Wrap: Gently shape the wrapped burger into a round, flat disc about 3 inches in diameter, then wrap it tightly with cling wrap.
- Chill: Refrigerate for 15 to 20 minutes so the rice and fillings firm up and the burger holds its shape.
- Prepare for Coating: Remove the cling wrap carefully, then dip the entire sushi burger into the flour slurry, coating all sides evenly.
- Coat with Panko: Roll the slurry-coated burger in panko breadcrumbs, pressing gently so the crumbs adhere, then place it on a plate.
- Heat the Oil: In a deep skillet or pot, heat the oil to 350°F (175°C), using a thermometer to ensure accuracy.
- Fry the Burger: Carefully place the sushi burger into the hot oil and fry for 3 to 4 minutes, turning once halfway through, until golden brown and crispy on all sides.
- Drain: Transfer the fried sushi burger to a paper towel-lined plate and let it rest for 2 to 3 minutes to drain excess oil.
- Slice Carefully: Using a sharp knife, slice the sushi burger in half, revealing the beautiful layers inside.
- Dress It Up: Drizzle sriracha mayo and eel sauce over the cut sides and around the plate.
- Garnish and Serve: Sprinkle furikake over the top, then serve immediately while the outside is still crispy and the inside remains cool and fresh.
- Prep Time: 15 minutes
- Cook Time: 30 minutes
- Category: Main Course
- Cuisine: Japanese, Fusion
Nutrition
- Serving Size: 1
- Calories: 350
- Sugar: 1g
- Sodium: 600mg
- Fat: 18g
- Saturated Fat: 5g
- Unsaturated Fat: 8g
- Trans Fat: 0g
- Carbohydrates: 40g
- Fiber: 3g
- Protein: 15g
- Cholesterol: 30mg
Keywords: Perfect for impressing guests or enjoying a restaurant-quality meal at home any night of the week.